Member-only story
Unity3D Basics — Animating Sprites

It goes without saying that animations can breathe life into your games. In Unity, the process of animating sprites is reasonably simple and straightforward. This process does not require any coding for the time being.
Previously, we used the Sprite Editor to slice our sprite sheets into individual images. In your Assets, the sprite sheet should now contain all of its slices.

Each of these slices will constitute one frame of animation. To begin animating, we must first open the Animation window.

To organize my workspace, I like to dock the Animation tab in the Game window. Having the Animation tab below my Scene view allows me to work on animations while previewing them simultaneously.

I will begin by animating my tank’s tracks.
I start by selecting my player GameObject. Once selected, the Animation tab will prompt us to push the Create button to begin. After clicking the button, a window will appear where you will need to create an animation file. Name this file appropriately and click on the Save button. The Animation Clip will now be ready for editing.

Note: By creating an animation clip, Unity will automatically add an Animator Component to your GameObject.
Let’s take a look at the Animation window before we continue.
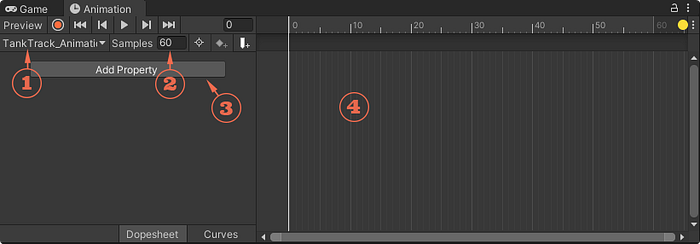
- This dropdown menu will give you access to all the animation clips associated with the Animator attached to the selected GameObject…